Create Chatbot
Step-by-step guide to creating your first chatbot using the chatbot creator flow.
The chatbot creator guides you through a simple 4-step process to set up your chatbot. This tutorial walks you through each step to get your chatbot up and running.
Overview
The chatbot creation flow consists of four main steps:
- Basics - Name your chatbot and define its behavior
- Knowledge - Add documents and data sources to train your chatbot
- Customization - Customize appearance and behavior settings
- Summary - Get the code snippets to embed your chatbot
A progress indicator at the top shows your current step and allows you to navigate between completed steps.
Creating Your Chatbot
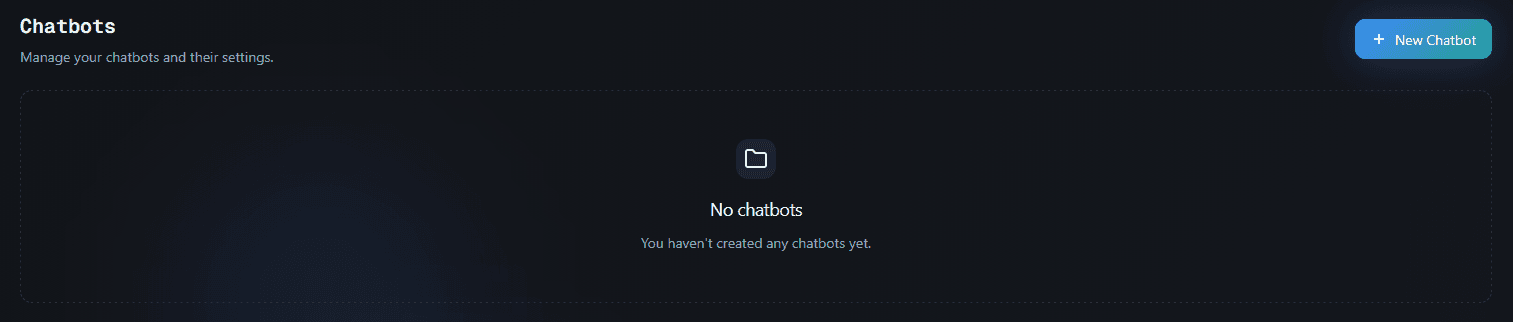
Start the Creation Process
- Navigate to your organization dashboard
- Click the "New Chatbot" button
- A new chatbot will be created and you'll be redirected to the Basics step
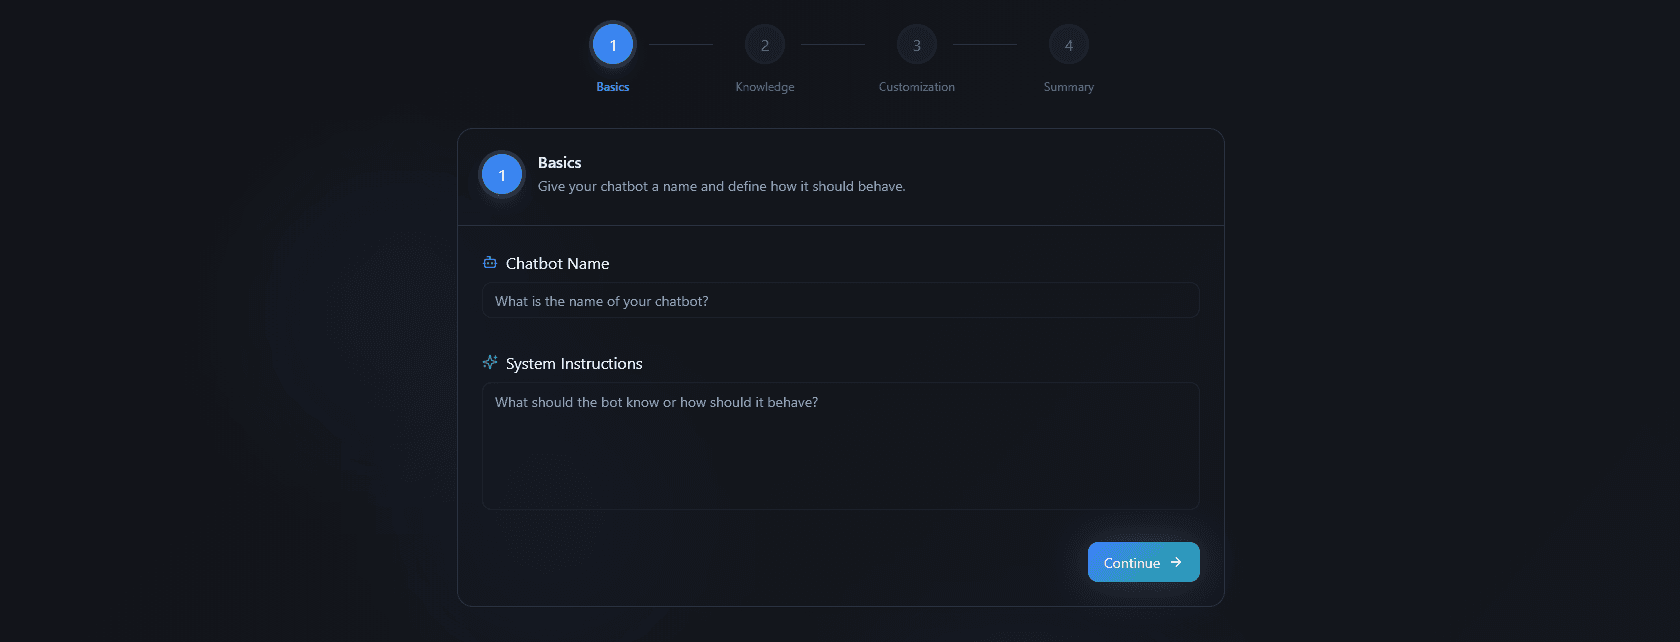
Step 1: Basics
In this step, you'll define the fundamental information about your chatbot:
-
Chatbot Name - Enter a descriptive name for your chatbot (e.g., "Customer Support Bot", "Product Assistant")
-
System Instructions - Describe how your chatbot should behave. This is crucial as it sets the tone and purpose of your chatbot. For example:
- "You are a helpful customer support assistant. Answer questions about our products and services."
- "You are a product recommendation bot. Help customers find products that match their needs."
-
Click "Continue" to proceed to the next step
The system instructions help guide your chatbot's responses and behavior, so be specific about what you want it to do.
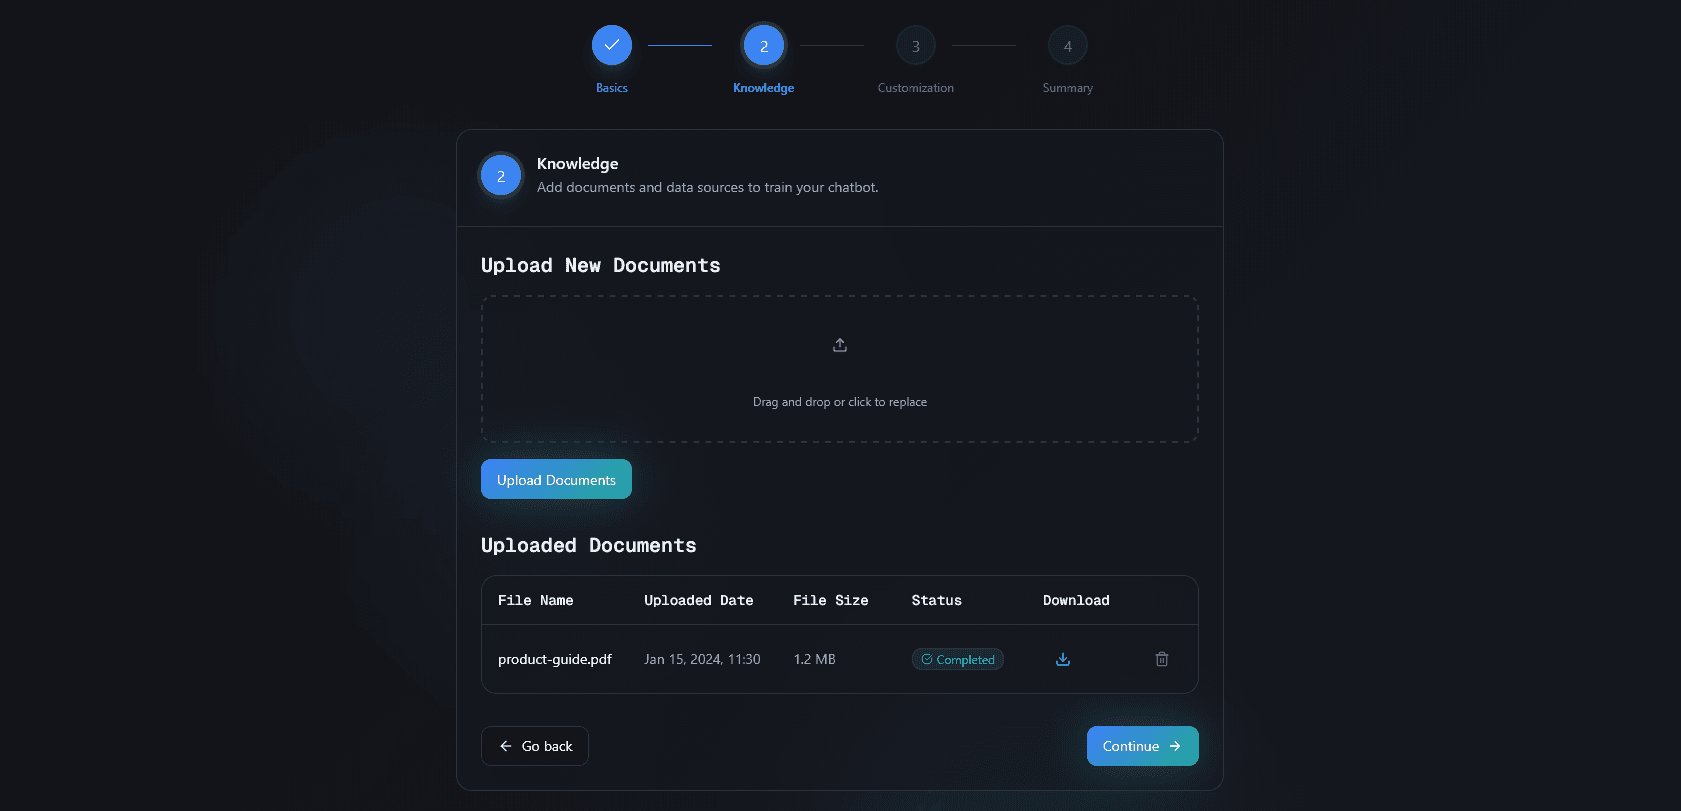
Step 2: Knowledge
In this step, you can add knowledge sources to train your chatbot:
Available Knowledge Sources:
- Documents - Upload PDFs, Word documents, text files, CSV, or JSON files
- Videos - Add YouTube videos with transcripts
- API Endpoints - Connect external APIs to fetch data
- Shopify - Connect your Shopify store to sync products
You can add multiple knowledge sources or skip this step and add them later. The more relevant information you provide, the better your chatbot will be at answering questions.
Click "Continue" to proceed to customization, or use the "Go back" button to return to the previous step.
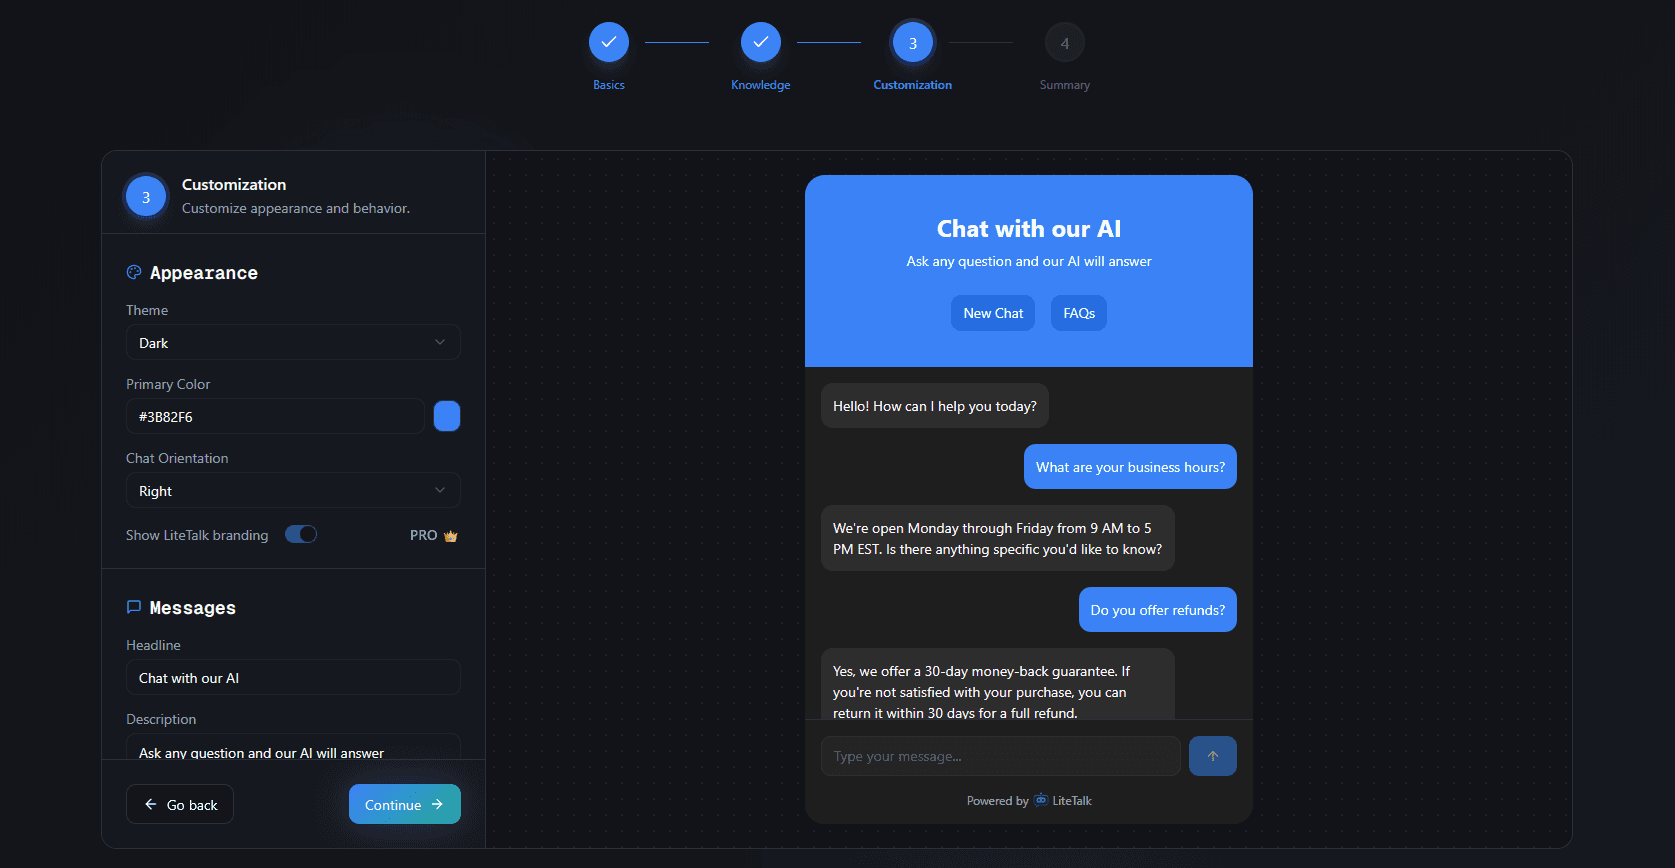
Step 3: Customization
In this step, you can customize your chatbot's appearance and behavior:
Appearance Settings:
- Theme - Choose between light or dark theme
- Color - Set your primary brand color
- Orientation - Choose left or right position for the launcher button
Text Customization:
- Headline - The main title shown in the chat window
- Description - Subtitle or description text
- Initial Message - The first message visitors see
- Text Input Placeholder - Placeholder text for the input field
- Button Text - Customize button labels (New Chat, FAQs, Back, etc.)
You can preview your changes in real-time and adjust settings until you're satisfied with the look and feel.
Click "Continue" to proceed to the summary, or use the "Go back" button to return to the previous step.
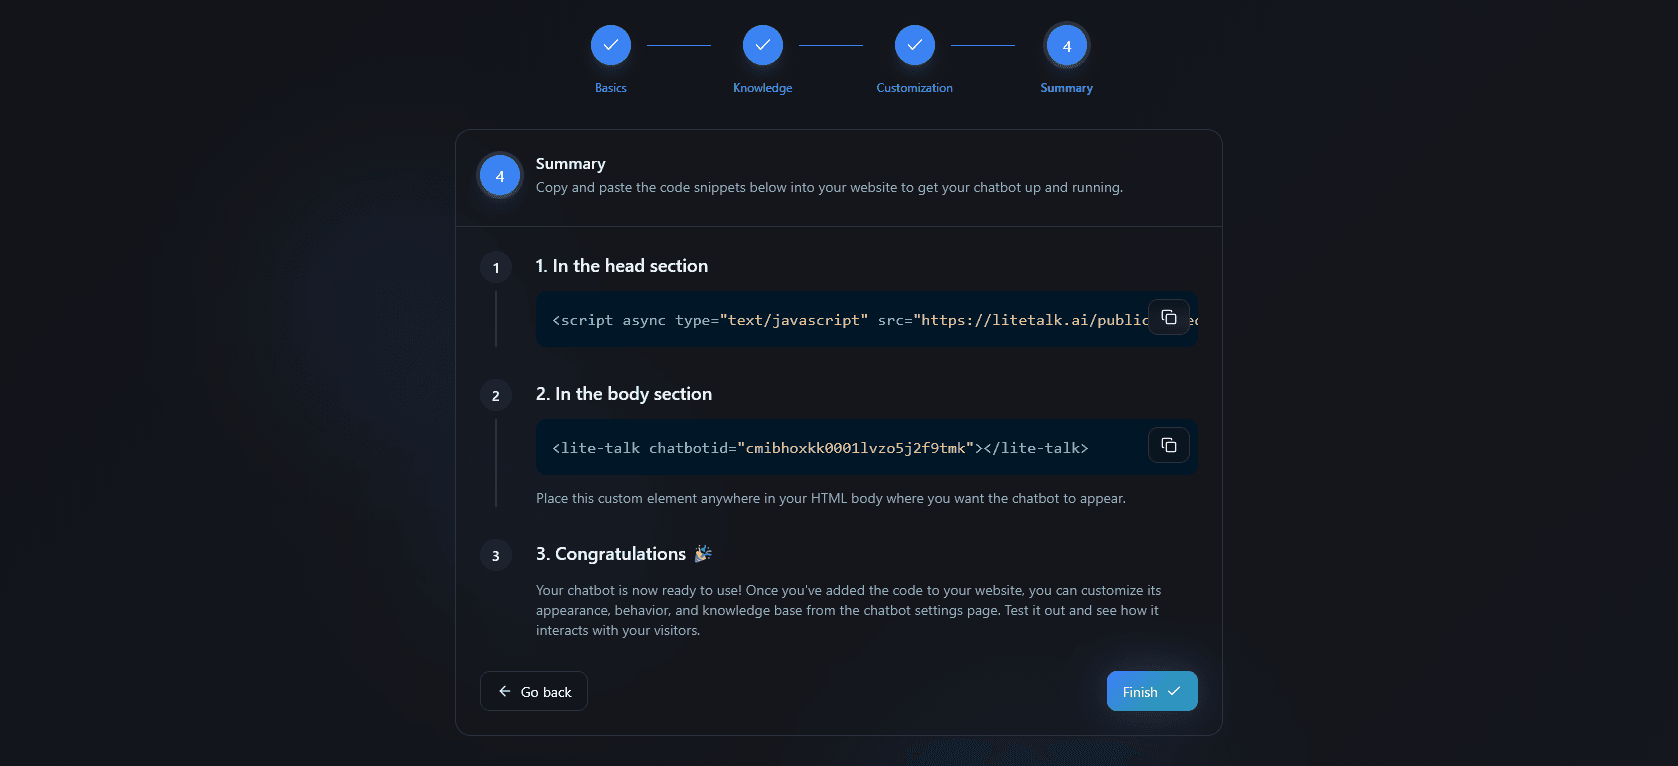
Step 4: Summary
In this final step, you'll receive the code snippets needed to embed your chatbot on your website:
-
Head Section Code - Copy the script tag and add it to your HTML
<head>section -
Body Section Code - Copy the custom element code and place it anywhere in your HTML
<body>where you want the chatbot to appear -
Congratulations! - Once you've added the code to your website, your chatbot is ready to use
After adding the code, you can:
- Test your chatbot on your website
- Continue customizing it from the chatbot settings page
- Add more knowledge sources as needed
- Monitor conversations and improve responses
Click "Finish" to complete the setup and go to the chatbot playground, or use "Go back" to make changes to previous steps.
Navigation Tips
-
Progress Indicator - The progress bar at the top shows all four steps. You can click on completed steps to navigate back and make changes.
-
Go Back Button - Each step has a "Go back" button to return to the previous step.
-
Continue Button - Use the "Continue" button to move forward through the steps.
-
Saving Progress - Your progress is automatically saved as you move through the steps, so you can leave and return later.
Best Practices
-
Clear System Instructions - Be specific about your chatbot's purpose and how it should behave. This significantly improves response quality.
-
Add Relevant Knowledge - The more relevant information you provide in the Knowledge step, the better your chatbot will answer questions.
-
Test Before Publishing - Use the playground to test your chatbot before embedding it on your website.
-
Iterate and Improve - You can always go back to any step and make changes, even after your chatbot is live.
Troubleshooting
Can't proceed to next step?
- Make sure all required fields are filled in (Basics step requires both name and system instructions)
- Check for any validation errors shown below the input fields
- Try refreshing the page if you encounter any issues
Changes not saving?
- Your progress is saved automatically as you move through steps
- If changes aren't appearing, try refreshing the page
- Make sure you're connected to the internet
Want to start over?
- You can delete the chatbot from your dashboard and create a new one
- Or navigate back to any step using the progress indicator and make changes